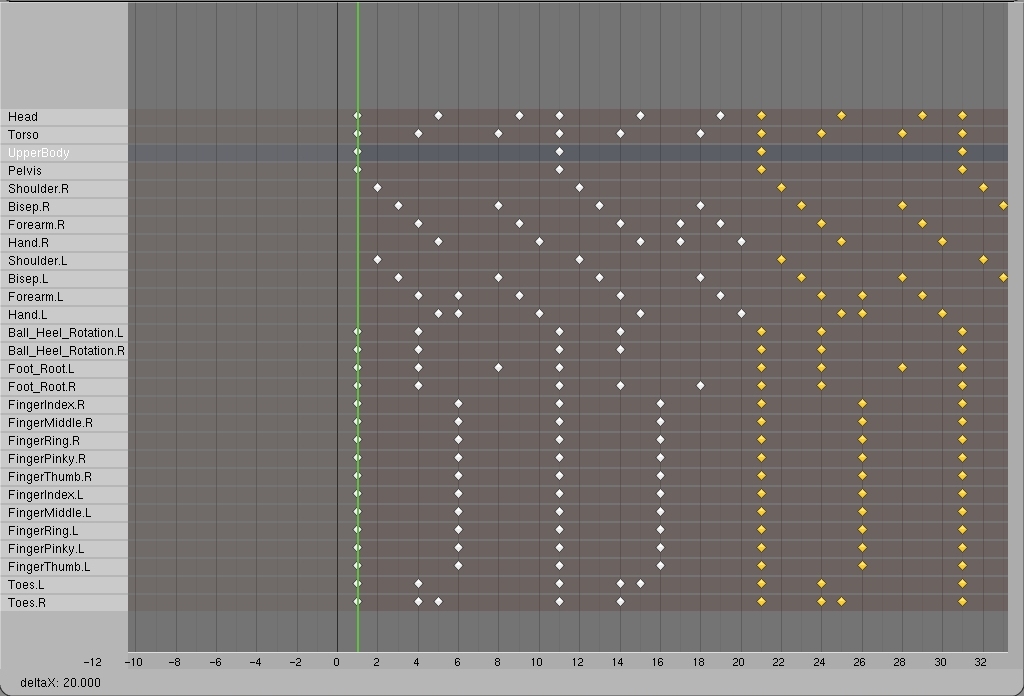
Now for making him walk farther along. First select all the keyframes (A-key).
Then duplicate them and move them so that the first set of keyframes of the duplicated group is right on top of the last set of keyframes from
the original group. (Or forward 20 frames.)
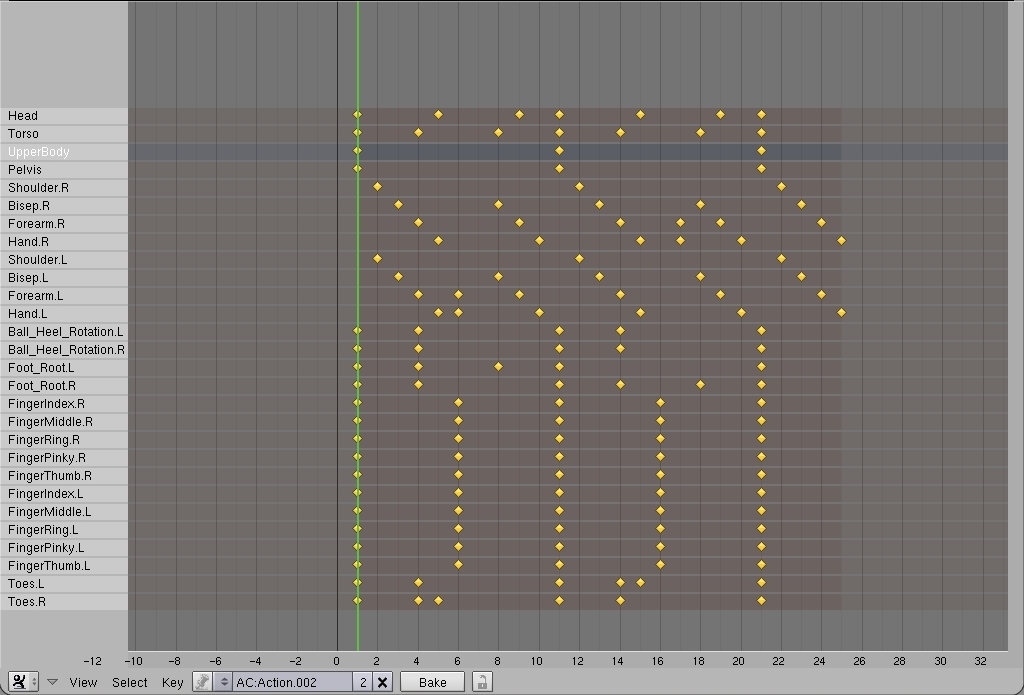
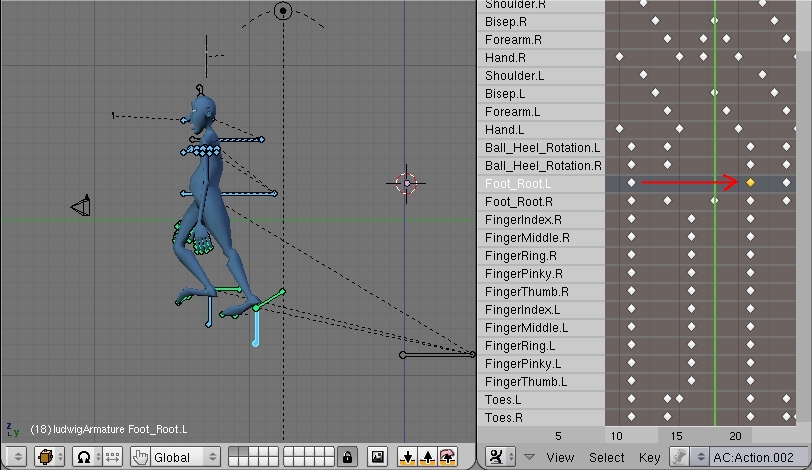
Whooee, look at frame 18. Whaaaat's happening. Well, you duplicated all his old keyframes, so he's going from his final position of his orignal walk, to the first position (backwards two steps) of his original position. So to fix this we'll need some duplicated and moving. But not much, just some.
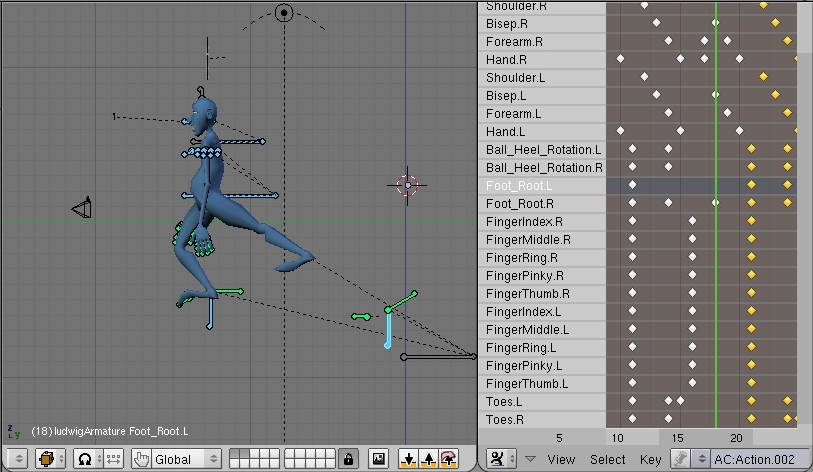
All right, back up a few frames to frame 11. The foot that's forward, Foot_Root.L should stay still, since that's the one he's standing on. So duplicate that keyframe to replace the next Foot_Root.L keyframe.
But . . . but . . . but what about his body?
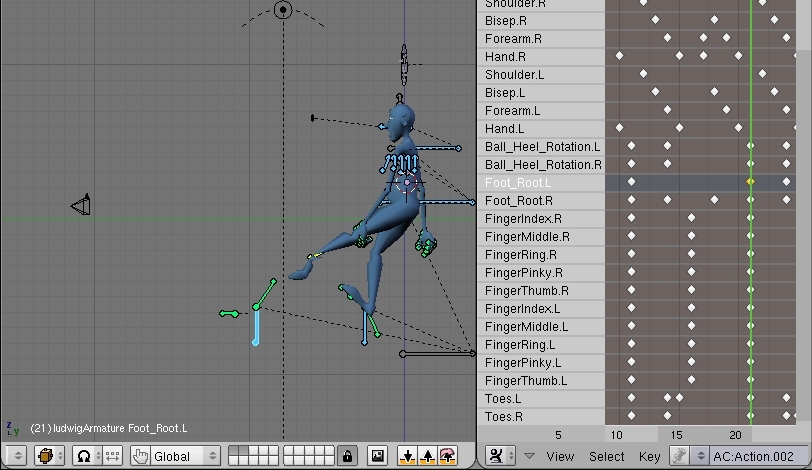
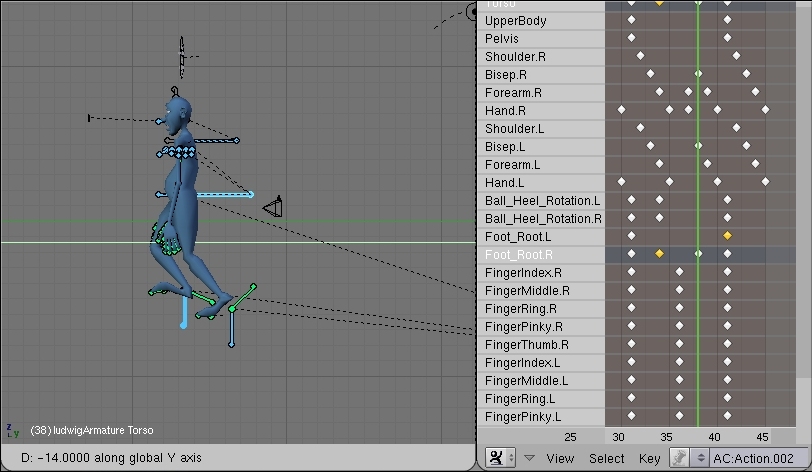
Well what about it? Grab Torso and Foot_Root.R and move them forward along the global y-axis until you get this:
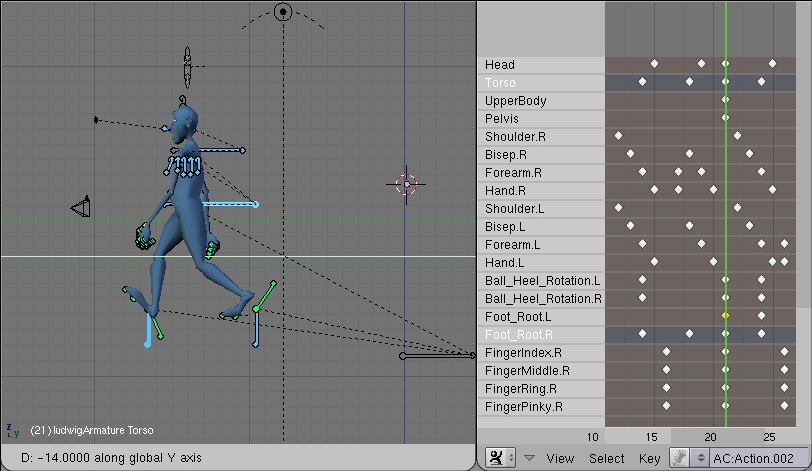
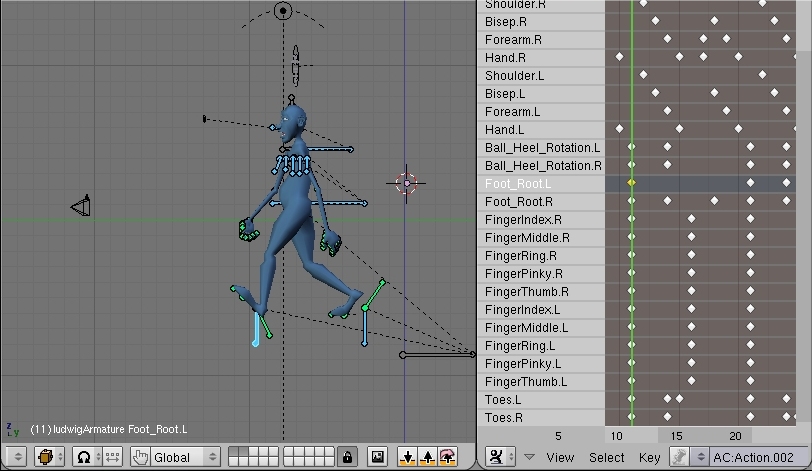
Frame 23, same thing. Move his body and Foot_Root.R forward again along the global y-axis until it all looks good.
So, having animated and taken the screenshots all in one day and put off writing the tutorial untill the next day, I have absolutely no idea what I did next, or what the heck these next images mean. Oh, I see. Basically you just need to keep duplicating the last position of his foot and moving his body forward to catch up. All right, here we go.
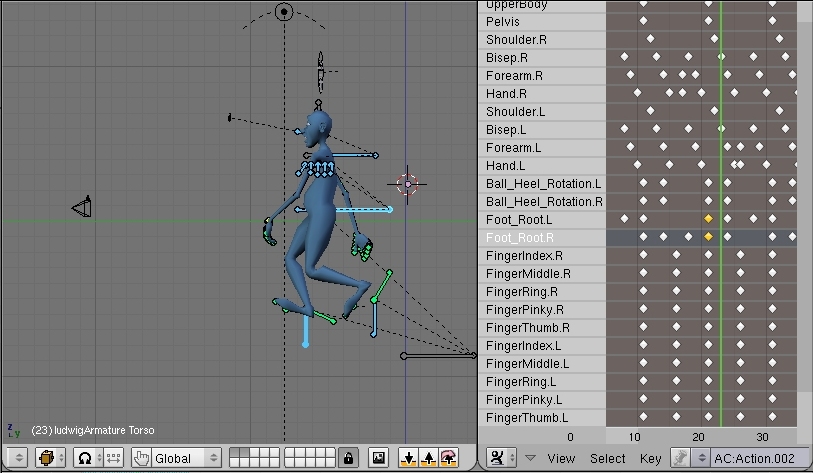
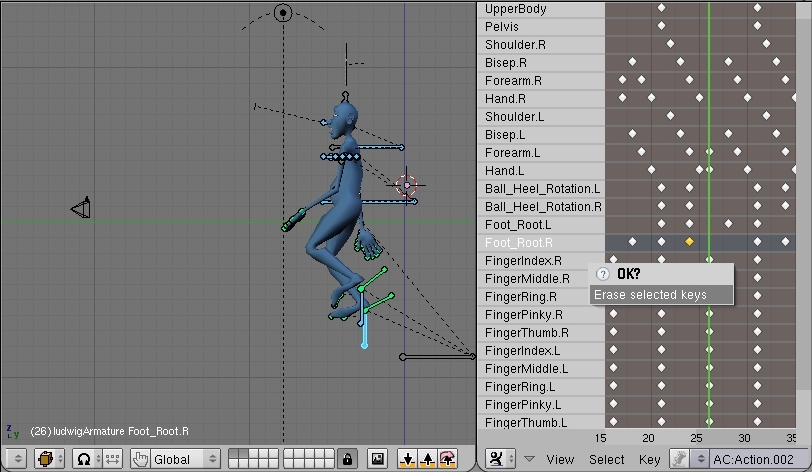
Foot_Root.R is in a bad position on frame 23. Delete that mutha.
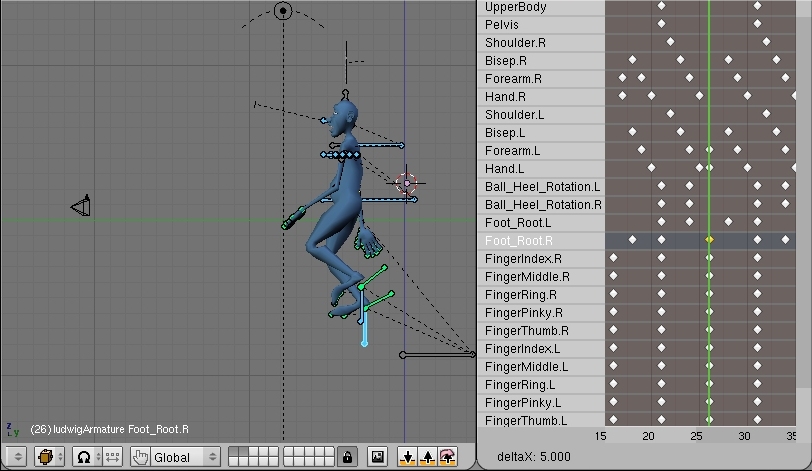
Duplicate his position from frame 21 to frame 26.
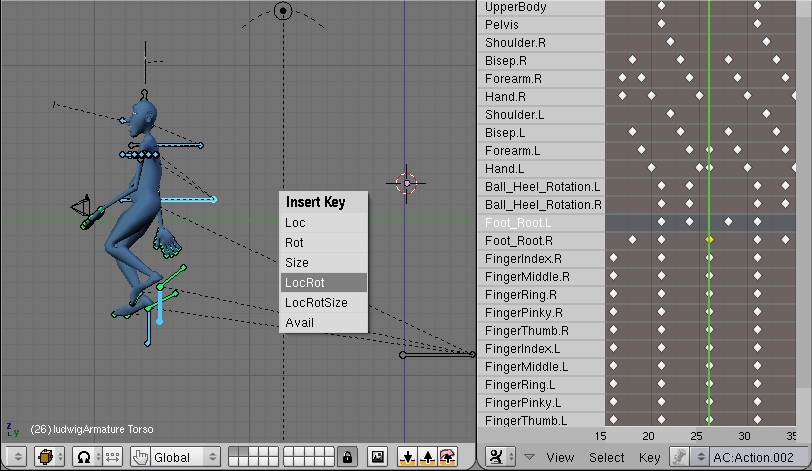
Now his whole body is behind once more, so grab Torso and Foot_Root.L and move them forward along the global y-axis until everything lines on for frame 26 and insert their locations and rotations.
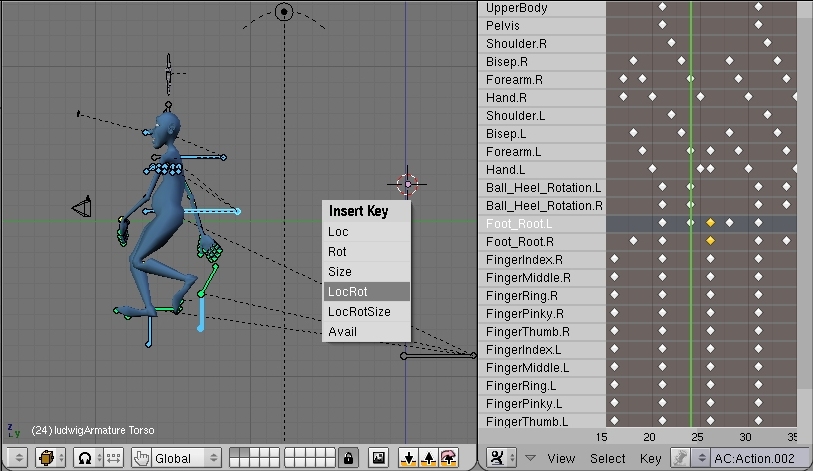
Now move Torso and Foot_Root.L forward again along the global y-axis, but this time on frame 24.
Now on frame 28, we need to move Torso and Foot_Root.R forward along the global y-axis.
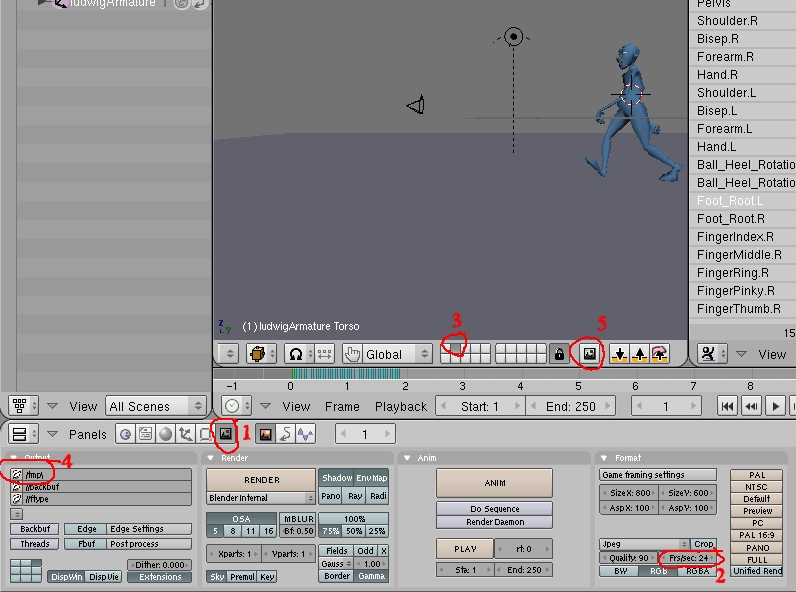
Go to the render buttons (1), make sure the frame rate is 24 (2), activate only layer 2 (3), press numpad 5, set the file path (4), and while holding ctrl down click on the playblast button (5). Then hit play and watch your animation!
Aaaaand, you should be done! Well, that depends. Me, I wasn't completely happy with the animation I ended up with. Didn't seem to flow quite right in some places. If that's the case, then the best thing to do is start over and work harder on your main poses. Those first main poses, called the "extremes," are the most important. Get those to look right, and get them timed right, and the rest of the animation is just adding details. I cannot exagerate the importance of good extremes. Those are the foundations of your animation. A building with weak foundations will fall. The same goes for an animation. The best way to make sure your extremes are good, is to video tape yourself acting out the sequence, and then bring that up next to your animation in the video sequence editor. Find the extreme positions in your movement. Copy them. Make sure the timing is correct. Most newbie animators animate too slowly. Make sure the extremes look good and the timing is right. Then add the breakdown poses (lifting up of feet, and such like). At the very end do the details like fingers and off-setting. Facial animation is always last, because if you can tell the story without any facial exrpressions, then you're just adding goodness to something that's already great.
Here's the walk animation I came up with. It's a little jerky, not quite as smooth as I would've liked. Generally this means too much opposing (i.e. up and down) movement in too short a space of time. So at this point I would go back, and make my up positions a little lower, and my low positions a little higher. The arms seem to move too fast, so I'd go back and make their movement less broad. It goes on and on. Again, a walk is one of the most difficult things to animate. So far I've only gotten one walk in all my animations that I'm completely happy with, and that one's really short. (It is in the beginning of Private Bob Episode I.)
Remember, there is no "right" way to animate (though, I guess there are a few "wrong" ways). The techniques used in this animation are meant to be helpful suggestions. You don't need to use all of them, but by using many (or all) of them, you'll develop your own workflow and bag of tricks. I hope you have learned something by following this tutorial, are more comfortable animating, and had a good time on top of it all.
Nathan Dunlap, a.k.a. LGM