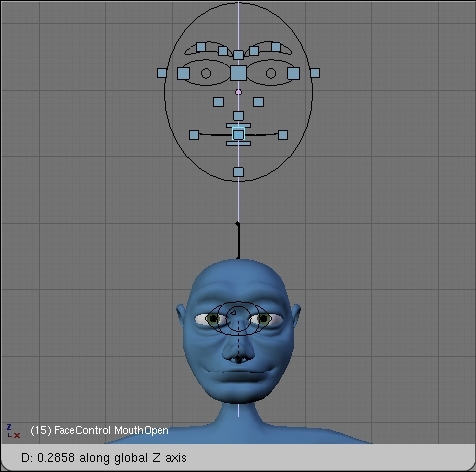
So for frame 15 close his mouth again.
His mouth stays closed through frame 16 so insert another keyframe on frame 16, keeping his mouth closed.
On frame 17, he says the "I" sound from "my" and so open his mouth and insert its location.

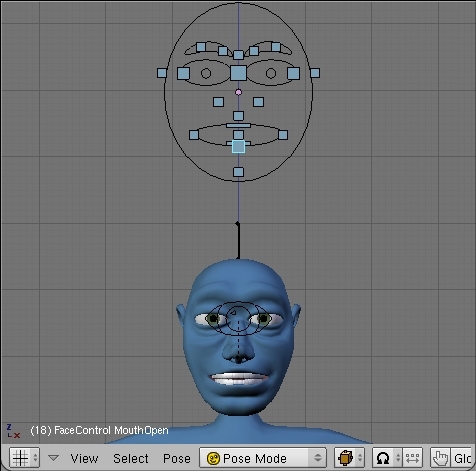
On frame 18, he says the "N" sound from "name" so close his mouth until all you can see is teeth. Insert the same key frame again on frame 19 since the "N" sound lasts that long.
Frame 20 has the "A" sound from "name" so open his mouth and insert the location.

Frame 22 has the "M" sound from "name" so close his mouth completely and insert the location.

I'm going to assume that you've got the idea now and I don't have to use all 95+ images of every single time I took a keyframe for all those phenomes. So continue just as you have been doing, copying what you've got from the spread sheet to ludwig. Remember for any time that a vowel is longer than 2 frames, open the mouth to it's widest point a frame after it says on the spreadsheet. This gives the mouth time to open, but keeps it moving in a "snappy" manner. Of course, opening it too wide results it too much snap and makes ludwig look like a nutcracker.
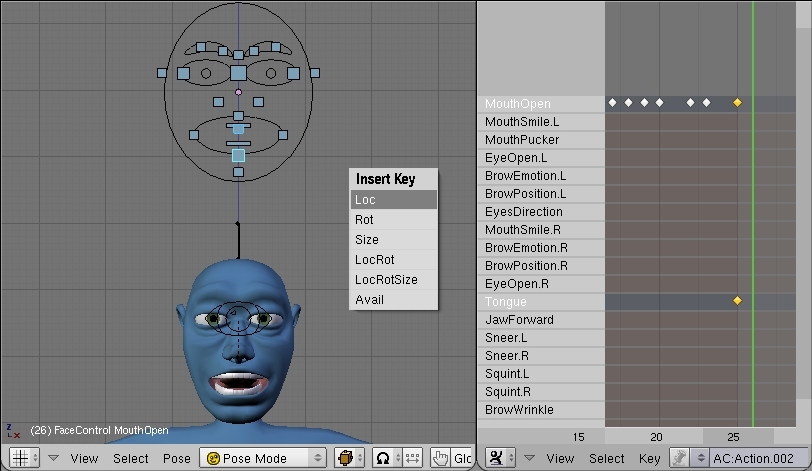
When you arrive on frame 26 you'll notice that you need the tongue to move. So on frame 25, select the Tongue bone and insert it's (rest, or default) location.

Then move to frame 26 and raise the tongue up to the roof of his mouth behind his front teeth. Insert it's location again.
Continue on as before, everytime you need to use a new bone (MouthPucker on frame 28, for example) insert the bone's rest position the frame before you want to move it to a new position.

For frames 35 to 43, you'll remember we kept it as a "G" shape. So just make that "G" shape on frame 35 like you normally would, and then skip to frame 42 and close the mouth slightly so that it cushions back through out all that time of silence.

Now on frame 44, you'll notice we have the "V" shape in our Magpie spreadsheet. To do this, select the JawForward bone (located underneath the chin bone in the face maquette) and insert it's location on frame 43 (this is a new bone remember). Then go into side view (NumPad 3), move to fame 44, and move the JawForward bone up a tad, and insert it's location.


You'll have to use another new bone, LowerLip, as well. Select it and go into sideview and move it up a tad and insert it's location.
